Raspberry Pi VNC: Remote Access & Control Guide
Have you ever found yourself needing to access your Raspberry Pi's graphical interface, but a monitor wasn't readily available? This common hurdle can be easily overcome with a clever solution: Virtual Network Computing (VNC).
The persistent inconvenience of not having a screen connected to your Raspberry Pi is a problem familiar to many enthusiasts and developers. Fortunately, VNC offers a seamless method for remotely controlling your Raspberry Pi from another computer, effectively letting you use it "headless" without a physical display. This is a powerful capability, opening doors to various applications, from managing your home server to working on projects while away from your primary setup.
| Category | Details |
|---|---|
| Technology/Concept | Virtual Network Computing (VNC) for Remote Access to Raspberry Pi |
| Core Functionality | Allows remote viewing and control of a Raspberry Pi's desktop environment. |
| Key Components | VNC Server (on Raspberry Pi), VNC Viewer (on client device) |
| Common Implementations | RealVNC, TightVNC, Remmina |
| Client Devices | Laptops, desktops, tablets, smartphones (iOS, Android) |
| Network Requirements | Local network or internet connection (with appropriate configuration, such as port forwarding or VPN) |
| Security Considerations | Potential security risk, especially on open networks; requires strong passwords and updated software; firewall settings are recommended. |
| Default Software | RealVNC Server is included with Raspberry Pi OS. |
| Alternative Solutions | NoMachine, TeamViewer, RDP (Remote Desktop Protocol) |
| Reference Website | RealVNC Viewer Download |
RealVNC Connect comes pre-installed with the Raspberry Pi OS. It's a comprehensive package, providing both the RealVNC server (for remote control of your Pi) and the RealVNC viewer (for accessing other computers remotely). This setup simplifies the process, allowing you to connect your Raspberry Pi to various devices, including laptops, desktops, and mobile phones, with ease.
Once you've enabled VNC on your Raspberry Pi, the next step involves installing a VNC viewer on your computer. This viewer acts as your window into the Raspberry Pi's desktop environment. Several VNC viewers are available, each offering slightly different features and capabilities. Popular choices include TightVNC Viewer, RealVNC Viewer, and Remmina. The selection often depends on personal preference and the specific needs of your project. RealVNC, due to its default installation, often provides a streamlined user experience.
VNC, or Virtual Network Computing, empowers you to remotely view and control a desktop environment, whether its across a local network or over the internet. This is achieved by transmitting keyboard and mouse inputs from the client device to the server (the Raspberry Pi), which then executes those actions and sends back screen updates to the client. This bidirectional communication creates a smooth, interactive experience.
The realm of VNC offers a diverse range of implementations, both free and commercial. TightVNC is particularly well-regarded for Raspberry Pi users, making it a compelling choice. The advantages are numerous, including the ability for the client to operate on any device you can physically interact with, like a laptop, desktop, tablet, or smartphone. The server, of course, runs on your Raspberry Pi, creating a straightforward and accessible architecture.
So, why choose TightVNC for Raspberry Pi access? The appeal of TightVNC lies in its lightweight nature and suitability for the resource-constrained environment of a Raspberry Pi. When you use VNC, the client relays keyboard and mouse actions to the server. The server then processes those actions on your Raspberry Pi and sends back updates to the screen displayed on the client. This simple exchange delivers the full desktop experience remotely.
The simplest solution for remote access to your Raspberry Pi with a complete desktop experience is often to use VNC. Because RealVNC is often included with the Raspberry Pi OS, and operates across all computers and smartphones, it is simple to setup. Alternative solutions such as NoMachine, TeamViewer, or RDP are also great options to consider.
Prior to setting up a VNC server to allow remote access to the desktop environment, ensure that a functioning desktop environment is already installed and running on your Raspberry Pi. With the default Raspbian package, this is generally not an issue as it includes a fully functional desktop environment right out of the box.
This is one of the most effective ways to control your Raspberry Pi. This step will look at how to use VNC from Windows, macOS, or Linux computers, or from devices running Android or iOS.
VNC, due to the nature of its architecture, can present a potential security risk, especially when used on open or untrusted networks. Because of this, it is not enabled by default. Therefore, it is crucial to understand and configure your network and device settings to ensure the security of your connection.
The client aspect of VNC allows interaction, running on a device like a laptop, desktop, tablet, or phone. The server component resides on your Raspberry Pi. When you interact with the client, the client relays your keyboard and mouse events to the server. The server processes those interactions on your Raspberry Pi, and subsequently returns the updated screen information to the client, keeping your remote experience up-to-date.
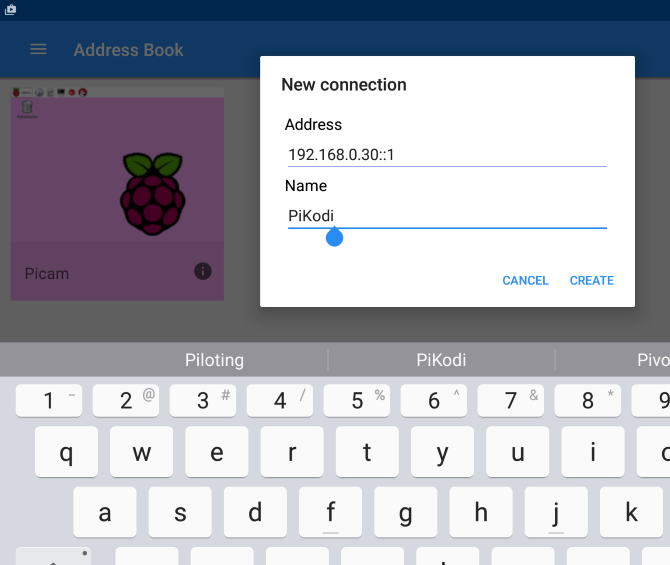
Moreover, you can install RealVNC Viewer directly on your Raspberry Pi. This allows you to access a remote desktop computer or another Raspberry Pi. The process typically involves entering the IP address of the remote machine. You can obtain this address from the terminal window on your Raspberry Pi by typing the command "ifconfig".
To establish a connection, initiate the VNC viewer on the other computer and enter the IP address of your Raspberry Pi. If the connection is successful, your Raspberry Pi's screen will appear on your computer, allowing you to control it as if you were directly using the Raspberry Pi.
The ability to remotely operate your Raspberry Pi opens up a wide range of applications, making it more convenient to use, by extending its reach beyond a physical display.
Transform your Raspberry Pi 4 Model B into a powerful computing platform in under 30 minutes. This comprehensive guide walks through essential setup steps, from initial hardware assembly to advanced configuration options, ensuring optimal performance for your projects.
Enable remote connections between computers by downloading VNC. VNC Connect is the latest iteration of our remote access software, suitable for both personal and commercial uses. It consists of a VNC server app, which requires a license, for the computer you want to control, along with a VNC viewer app that can be freely downloaded to any device you want to control from. Download VNC viewer for Raspberry Pi to the device you want to control from.
For optimal performance, it's generally recommended to install RealVNC Viewer and RealVNC Server together using the RealVNC Connect setup application. Consider exposing SSH or VNC on your Raspberry Pi over the open internet, within a VPN, or by using an external service, like RealVNCs cloud VNC Viewer.
Another option is to use Raspberry Pi Connect, which is a free screen-sharing and remote shell service provided by Raspberry Pi. VNC Viewer is also available for macOS, Linux, Android, and iOS platforms, along with a web interface. To download VNC Viewer, visit realmac (magpi.cc/htpnbm) and click the download link. Install and open the software.
The VNC server displays your IP address, and is used to log your Raspberry Pi into VNC Connect, enabling remote access via the wider internet.
Set up and use VNC on Raspberry Pi for remote access. This guide covers the setup on Raspberry Pi 5 and OS Bookworm, advanced configurations for security, and troubleshooting common issues like black screens and lag, making it ideal for both beginners and experienced hobbyists. Learn how to configure a VNC server on your Raspberry Pi for remote access to its desktop.
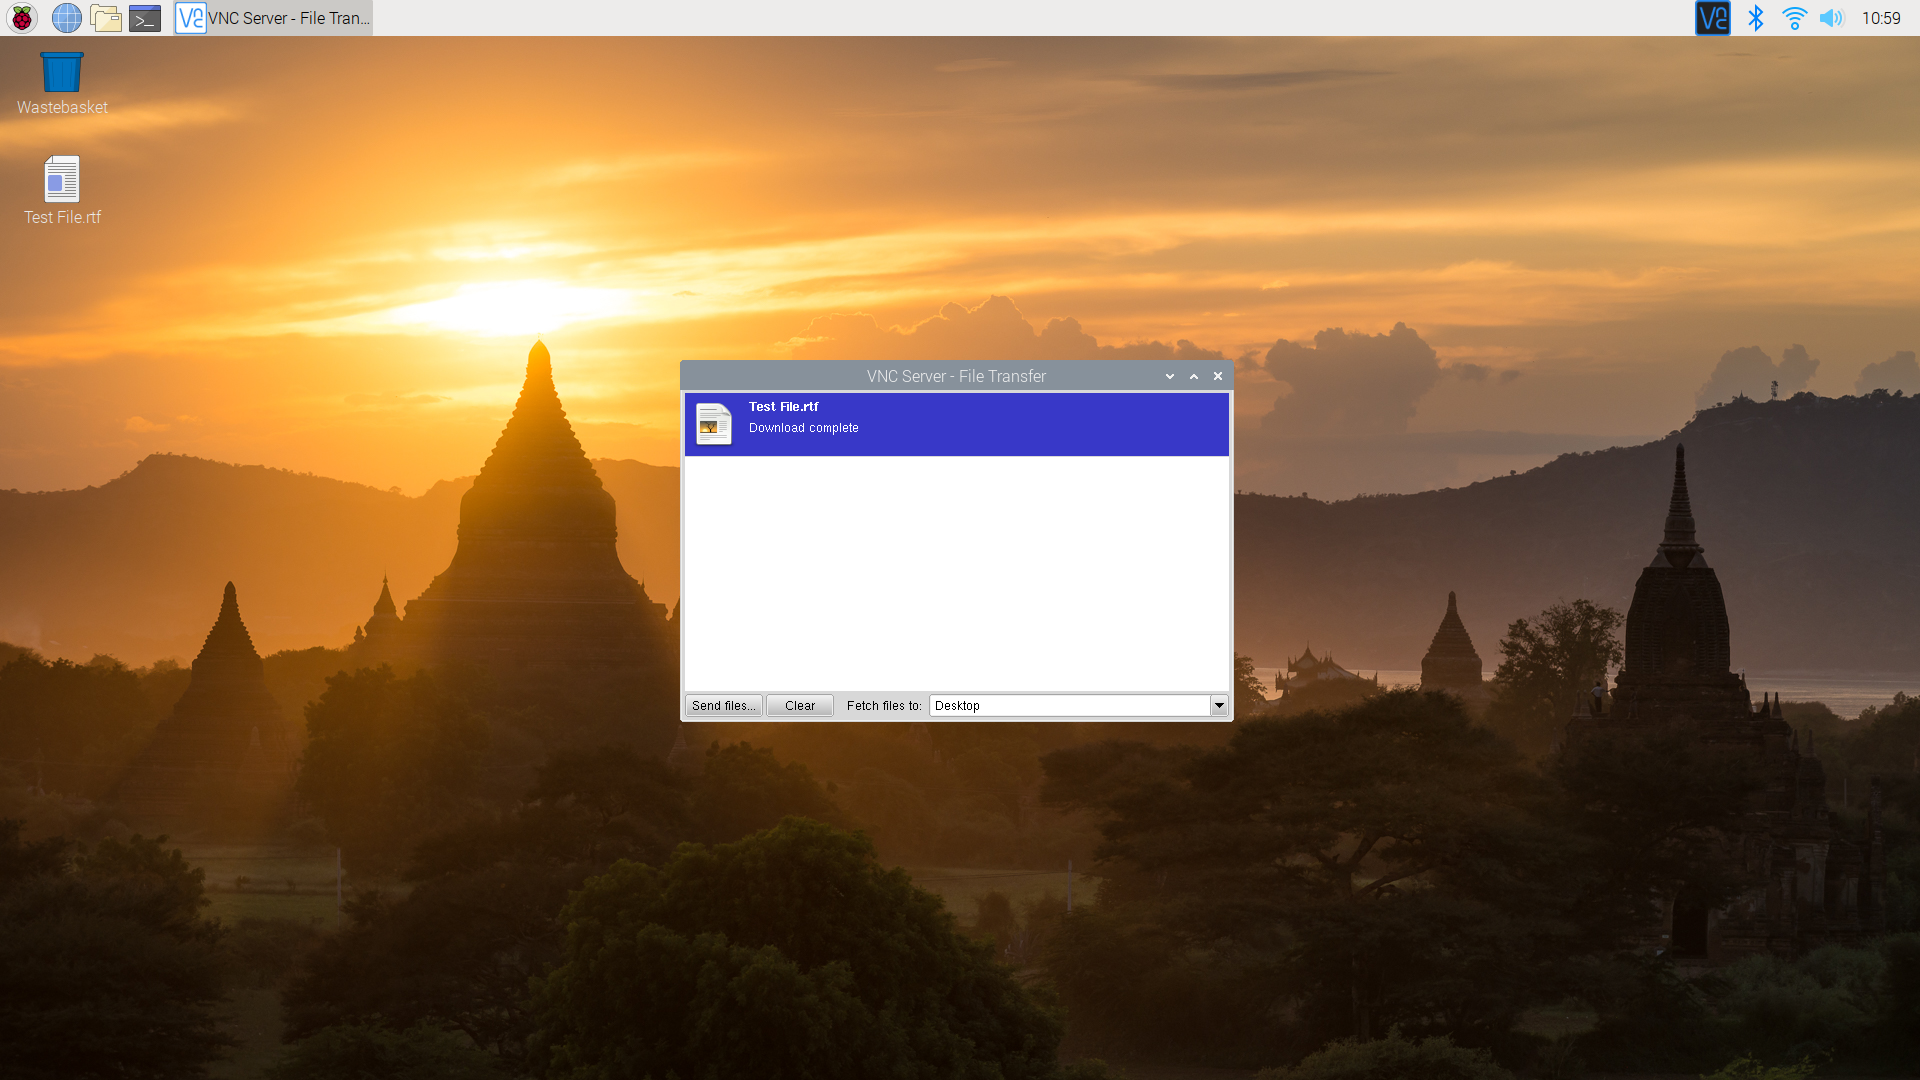
Access the Raspberry Pi desktop remotely through a VNC viewer on the client device, or configure port forwarding for external access. You can also enhance VNC security by using strong passwords and keeping your software up-to-date. It is also recommended that you configure your firewall settings to guard against external access.
I've talked extensively about remote access solutions for Raspberry Pi on this website, comparing different applications and their pros and cons. The overarching goal is to control your Raspberry Pi from another computer, whether on the same local network or from anywhere, depending on the solution you choose. The client device can be a laptop, desktop, tablet, or phone with which you interact, and the server resides on your Raspberry Pi. When using VNC, the client transmits your keyboard and mouse actions to the server. The server then executes these events on your Raspberry Pi, and returns screen updates to the client. This provides an intuitive, real-time remote desktop experience.
Transform your Raspberry Pi into a versatile remote workstation by setting up remote desktop access in under 30 minutes. This guide walks you through the essential steps, ensuring a streamlined and efficient setup process.
So, the aim is to install the VNC server software along with a web-based HTML5 client onto the Raspberry Pi. This will allow you to connect to your Raspberry Pi using a web browser. To get started, you'll need to install a few essential packages, including TightVNC server and the "screen" utility.
An application running on the Raspberry Pi allows the VNC client to connect, view, and control your Raspberry Pi desktop. On your desktop computer (Windows / Linux / Mac / ...), or on your smartphone / tablet, you install an application that connects to your Raspberry Pi running the VNC server.
The Raspberry Pi's small form factor and low power consumption make it perfect for remote deployment, and accessing it from another computer is a very common user request. There are many different solutions for remote access to the Raspberry Pi. The most common methods involve using either of two main techniques, as previously mentioned.

